Showing posts with label DIY project. Show all posts

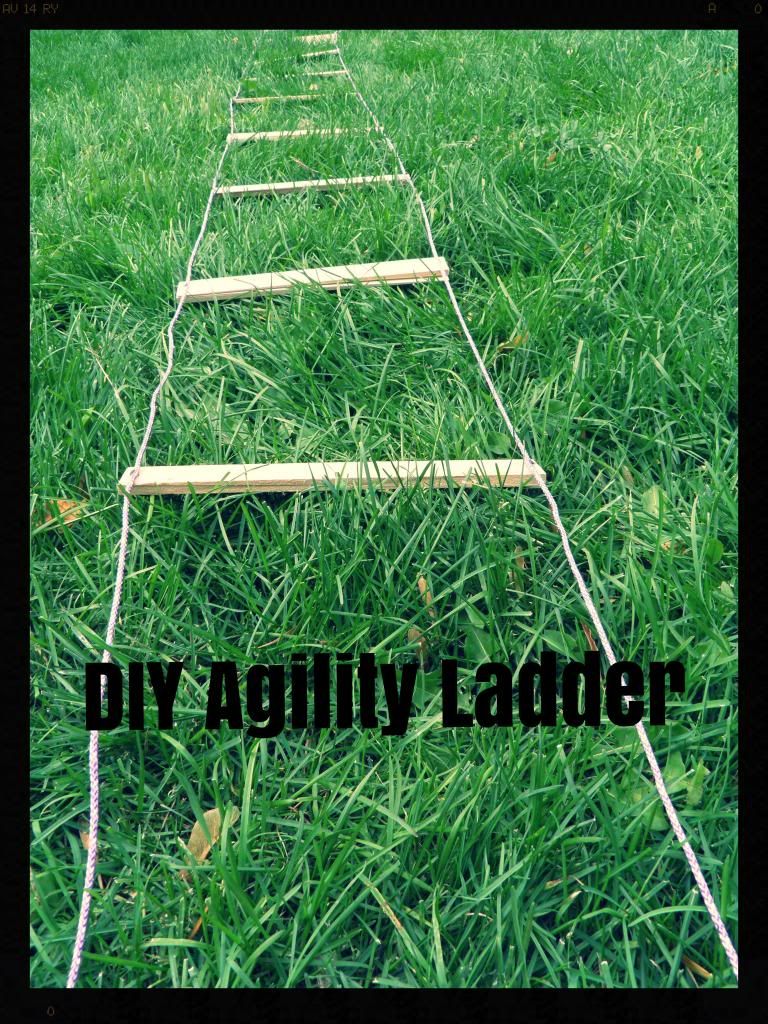
Agility Ladder DIY

Wednesday, February 12, 2014

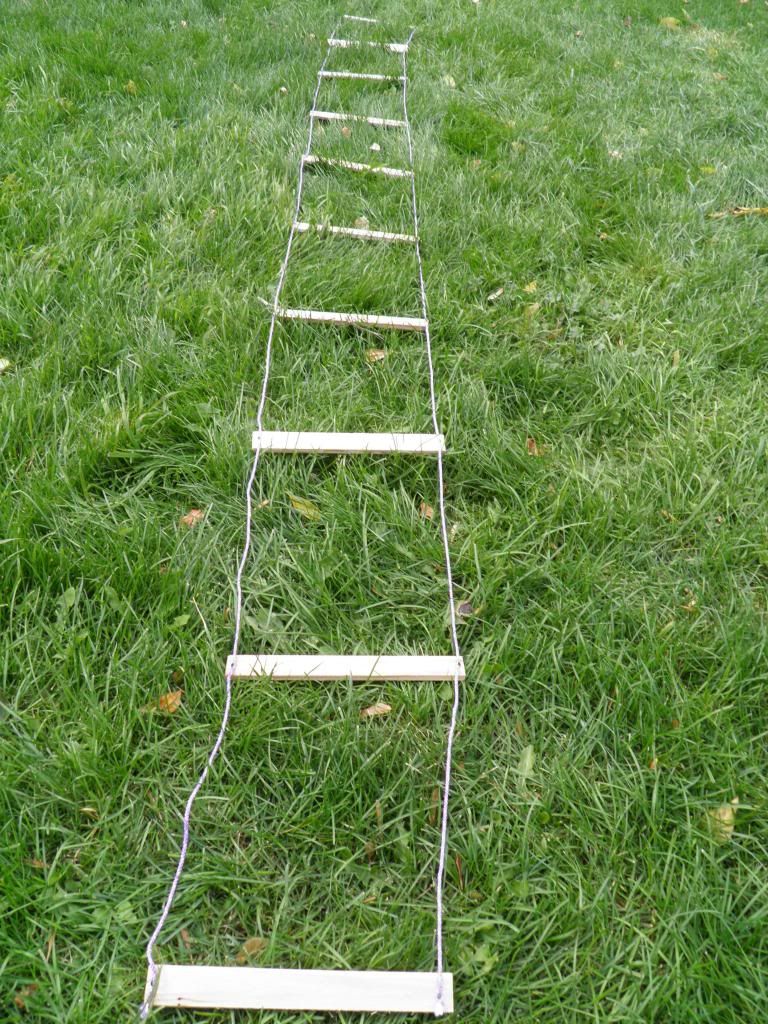
You can get all the supplies to make your own agility ladder at a regular hardware store, and it really only takes less than half an hour to make.


 photo 011ac215-35d0-4db1-b0ee-06d9ffe3613a_zpsef1dcba7.jpg

Agility ladders are an amazing unsung fitness tool that you're probably not using. I will be back to share some agility training drills soon too, so stay tuned for that. But these exercises shouldn't be saved for professional football players or high school track teams. Agility drills not only increase your agility, but they also provide a great source of cardio, especially if you're getting bored with your treadmill routine. You can get pretty creative with your fancy footwork, like sport dancing, and it also tests your mental acuity. We did some agility drills at the NASM workshop I attended and they were kind of fun and challenging and had me out of breath within a few minutes.

 photo P9162039_zpscfa561cf.jpg

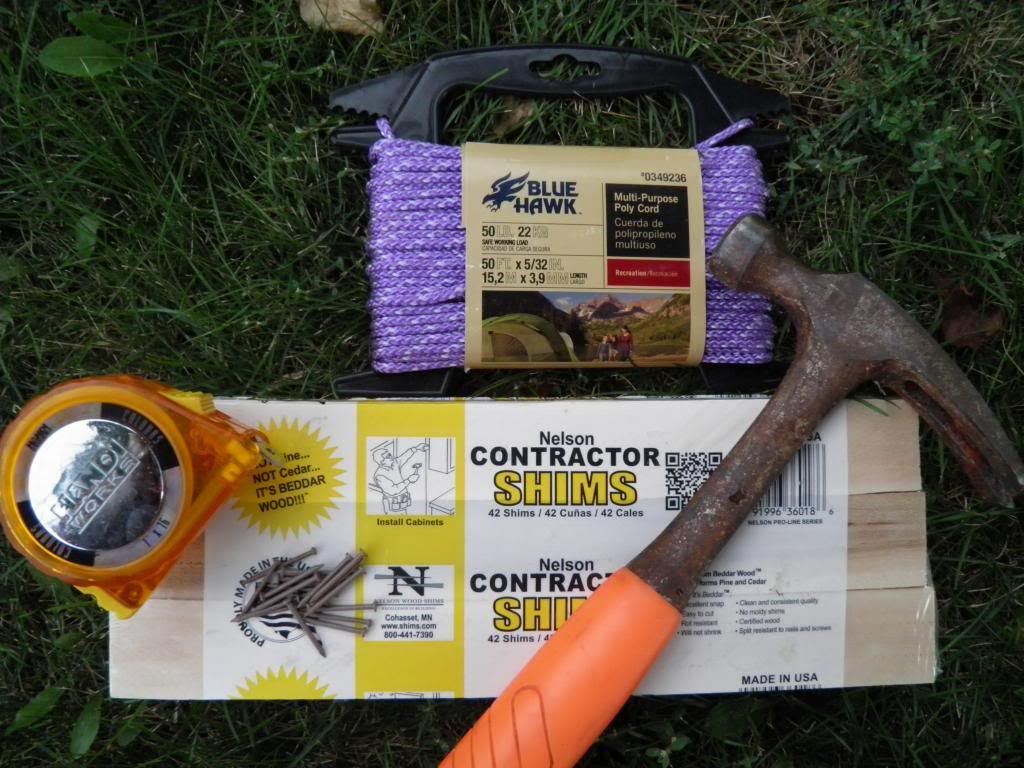
Supplies:

  • Short nails/carpet tacks
  • Hammer
  • Wood shims or other flat thin wood*
  • Rope
  • Tape measure


Instructions:

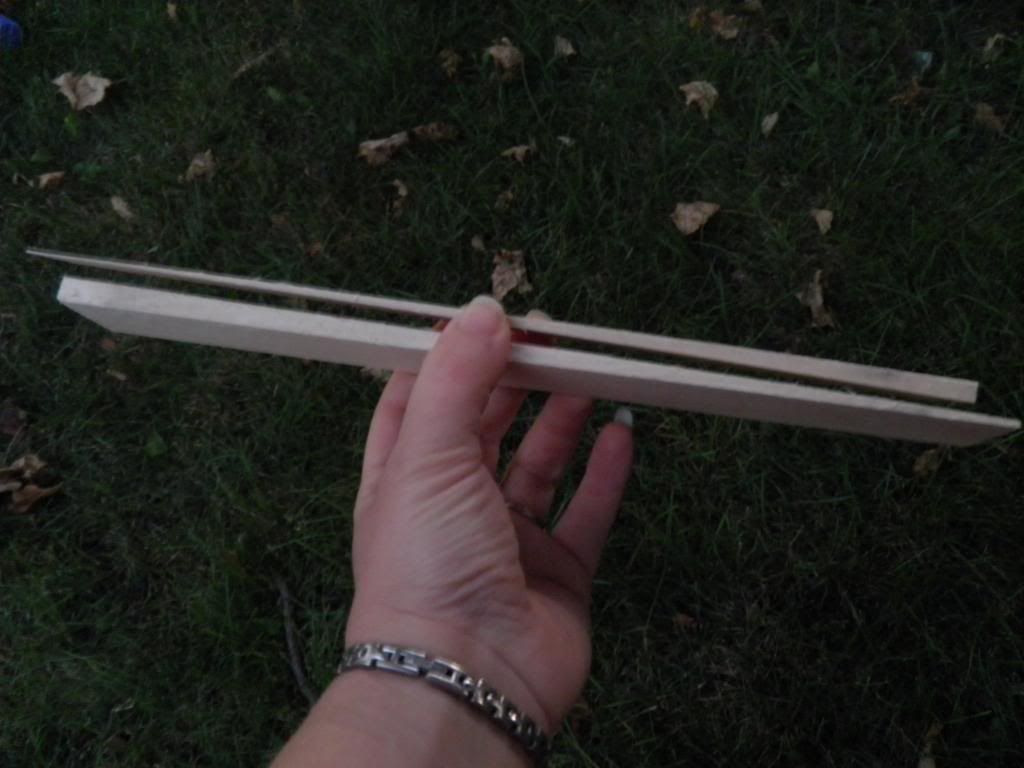
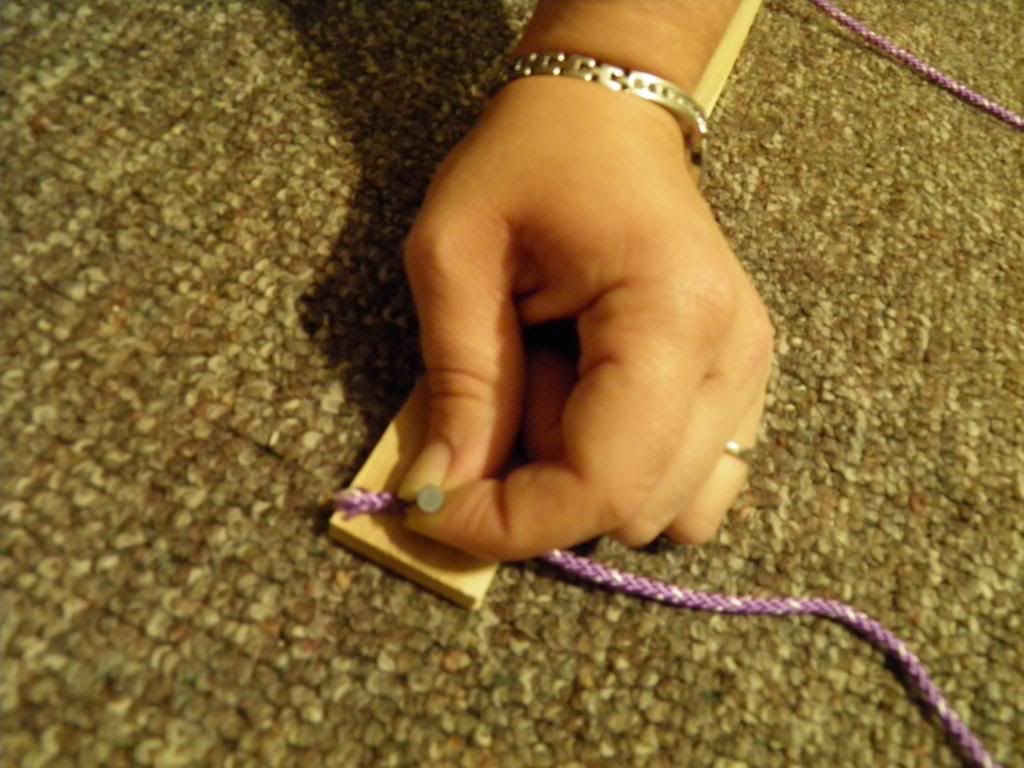
1. Stack two shims on top of each other with one narrow side and one thick side of each together. Nail the end of the rope into the top of the first shim stack.

 photo P9162040_zps25ff1b62.jpg

 photo P9162041_zpsdd87535f.jpg

2. Measure 15 inches to the next rung and hammer another nail into the top of that shim stack.

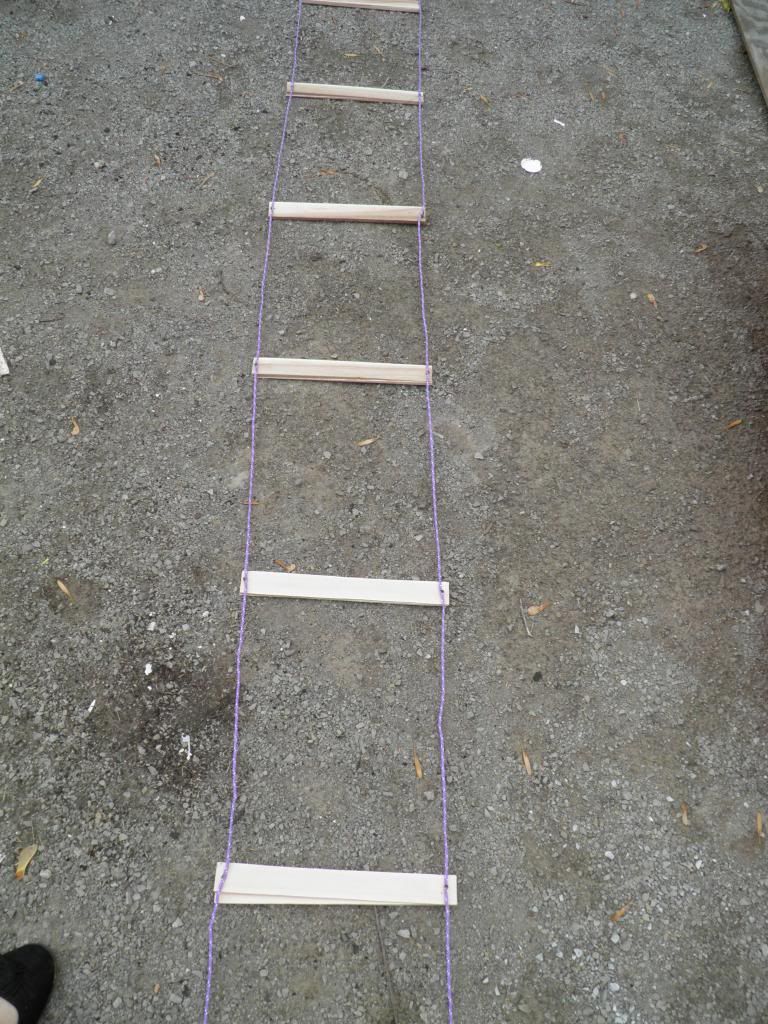
3. Continue until you have 15 rungs. Cut the rope at the end of the 15th rung. Now, go back and do the same thing on the other side of the ladder, hammering the string to the shims every 15 inches.

 photo PA262102_zps62fac132.jpg


 photo PA262099_zps34dd1886.jpg

Voila, your very own agility ladder! It's easy to fold up and hang in your garage or shed. Be careful if you're doing this project outside with little kidlets around. All the neighbor kids ran over when they saw what I was doing and asked if they could "help." Um, no. And we ended up with a knocked over pile of nails in the grass that I was really trying to prevent (barefoot in the summer, ouch!). Just hand them a few shims and a little length of rope and see who can make the best godseye.

*I would actually recommend using some thin wood versus shims. Shims are what I had on-hand, but nailing into the narrow ends proved to be a bit tricky. The wood needs to be pretty thin though, so you're not tripping over it. Also, if you have feet that are much larger than mine (women's 8), the width of a shim might not work for you. You should be able to fit both feet inside with some room left over, so take your own measurements from there.


Easy Budget Picture Collage Wall

Thursday, October 10, 2013

I am not very good at following strict rules when it comes to home improvement-ish projects. There was no level or tape measure used in the making of this project.

I've had one sad little picture hanging on my dining room wall for, like, years that needed some friends. I started to put together a few framed pretties after framing Hubster's anniversary card and ultimately decided to make a collage wall.

Photo

To begin, gather some of your favorite photos, art prints, and original artwork with repeating themes and colors. The frames should either be all light-colored or all dark-colored or somewhere in between. If your pictures include matting, the same rule applies--go with a monochromatic color scheme. There has to be some semblance of similarity or your wall will end up looking like a hodge podge--unless you're going for that look:)

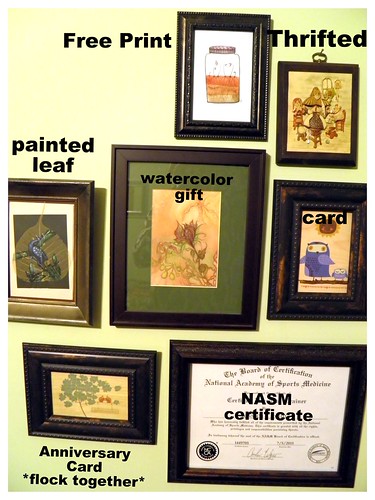
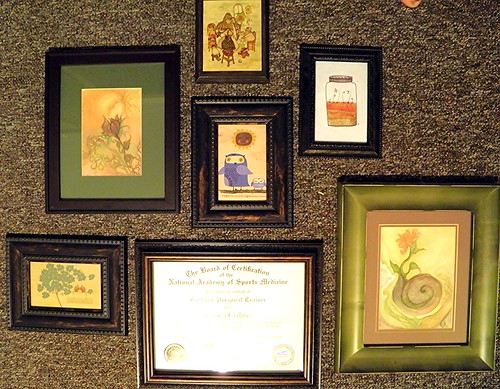
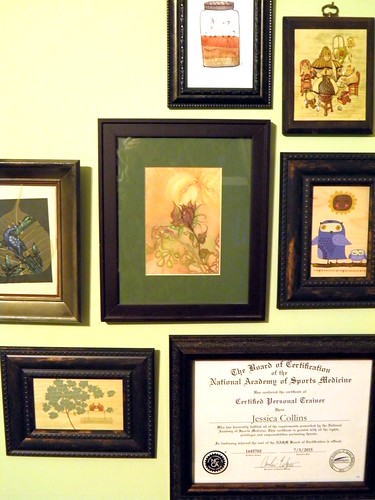
My framed pictures include one wooden anniversary card, one wooden owl card from Mackinac Island, my official NASM certificate, one thrifted 3D picuture, one free print from here, one painted leaf and one watercolor gift from a friend. I love how each piece has a history and story behind it from family trips to personal accomplishments to wedding gifts. Each one is totally my style too with a vintage/nature theme with lots of greens. The final product matches my record player set-up perfectly with its vintage-y vibe.

Wall prints


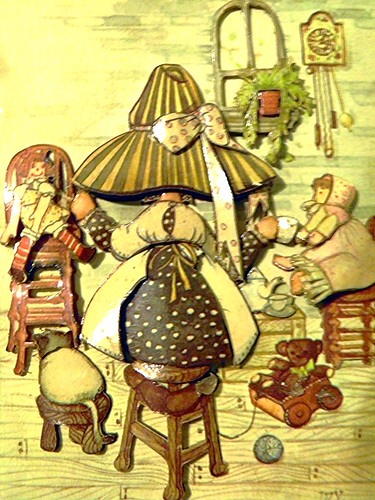
3D vintage print
The cutest vintage 3D picture ever!


Next, I took all my framed pieces and laid them out on the floor in front of the chosen wall. It took awhile to find just the right arrangement for the wall. The trick is to find a good balance. You want to balance the bigger with the smaller. I also had to balance the white and off-white art backgrounds. Keep all frames pretty close together with about 1-2 inch gaps in between. Add and take away frames until you find the sweet spot.


Wall Collage

Now, most professional collage-ers (whoever they are) will tell you to draw out the pattern on paper and get out the level to find the most precise angles. Well, I made this wall without doing any of those things. You may want to at least take a picture of your set-up to refer back to before you get started. I just eyeballed it. I memorized right about where one picture overlapped another and got to work. I'm not the type of girl who likes to fuss over things.

Finished Collage

Then, I just hammered away until they were all secure (which is really hard for me to do because I don't like tainting perfectly smooth walls, even if they're my own). You'll want to be careful with the nails too, avoiding any electrical wires and ideally pounding the nails into studs. It's nice when your whole family takes a hunting trip and leaves you with your whole house as your open canvas. Oh the possibilities!

vintage collage wall

Now, I really love walking past this wall. It really makes me smile. Oh yeah, and the best part? I only paid about $6 for this entire project. I paid 50 cents for the vintage picture and around $3 for each of the wooden cards. The rest of the items were gifted or free!

Other good gallery collage wall resources for those who like a little more structure:

How to Hang Art Groupings
Tips for Installing a Gallery Wall
Wall Art Guide
How to Create a Gallery Wall on a Budget
Eight Ways to Display Artwork on a Budget

DIY Jewelry Organization Makeover

Wednesday, October 2, 2013

My jewelry collection was an eyesore. Let's just put it at that (you'll see). I would forget about pieces buried in the bottom drawer of my jewelry shelf, all those necklaces had a tendency to get clumped together, and it just gave me a headache to look at it. Finally, in an attempt to make little spaces like this of my home environment more cozy and put-together, I decided to tackle the jewelry organization project head-on. With a little perusing on Pinterest, I put together some rough ideas of what I wanted the finished project to look like and headed to the thrift store.

I went through about three phases of putting this project together over the course of about a week, so I'm going to share those with you in case it provides some inspiration for you too:

Phase I
Thrifting a jewelry holder and giving it a makeover


Thrifted wooden spoon holder

What began its life as a collector spoon holder (I think??) is now the bearer of all my jewelry.

I went to the thrift store with the sole purpose of finding some old forgotten knick-knack shelf to repurpose, since they're usually quite easy to come by. After perusing the correct aisle, I didn't come across any that I was satisfied with. The selection was pretty picked over at the time I got there, so I went on my next mission in the store, to find some 16x20 frames. By chance, I returned to that original aisle again to return something I decided against buying and did one more quick sweep. This ugly gem was hidden under some other nondescript wooden things. It's really made out of some quite durable wood and had that nice drawer on the bottom for earrings and such. Score!


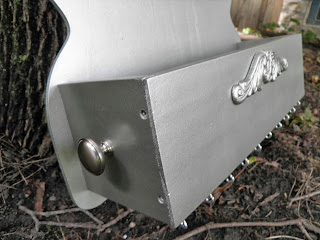
After work the next day, I took a trip to the hardware store and stood a full 5 minutes in the paint aisle trying to decide what color I wanted this bad boy to be. I had green in my hand, but I was still debating. Our bedroom is green, but what if it didn't quite match? I finally thought, why not make the jewelry shelf match some of the jewelry itself with a fresh coat of silver? While I was at the hardware store, I also picked out two drawer knobs and some ring screws to add to the shelf for extra storage.

Silver jewelry organizer

The finished product. A HUGE improvement!


Hubster helped me find the right screw length for the side knobs, but I did all the work! These knobs and extra screws on the bottom provide extra storage for longer necklaces and such.


Phase II
Cleaning the jewelry

While I was going through my jewelry, deciding what to keep and what to donate, I came across a few pieces I still really like but that have become quite tarnished with age. With a little research online, I decided to try lining a glass casserole dish with tin foil, sprinkling baking soda over the jewelry, and pouring water over the top. This worked for some of the jewelry, but I had to go back and rub toothpaste on a few items to really get them to shine again. No expensive jewelry cleaner required!

Baking soda and tin foil for tarnished jewelry


Phase III
Jewelry organization


In order to tame the chaos that my jewelry had become, I wanted the finished project to be as orderly and visually appealing as possible. The first thing I did was gather some silver cardstock from my scrapbooking collection. I made these nice earring cards by simply poking holes in the folded cardstock with a thick tapestry needle that I had, but I'm sure a safety pin would've done the trick. I absolutely adore how my earrings are all organized and easy to grab now. I can get a good look at them all with one quick glance. And none of them are buried in a mess, only to never be used again. In fact, today I'm wearing a pair of earrings I had forgotten I even had!

Next, I strung all my necklaces on the spoon holder thingies, which turned out to be great necklace holders. Hubster happened to have a nail that perfectly matched the silver shelf, so I used that to affix the organizer to the wall behind our dresser. Now all my necklaces are completely visible, making getting dressed in the morning quick and easy.


Before

It pains me a bit to even show this (bad lighting notwithstanding) "before" picture. It's really unnerving to keep my jewelry in such a disarray. And you can't even see the dust bunnies collected there. *Shiver*

After

Not only does my jewelry look much better, but now my collection of glass perfume bottles is also on display again. Those pretties were kind of shoved behind my jewelry shelf and piled on with...random things. Now they're all out for show again, just as I like them.

I've been collecting these pretties since High School


Ah much better


I forgot I even had this little ring holder in all my mess of things. It came in handy since I didn't really have any other viable, convenient place to store my rings. The ring holder came with a matching vintage mirror and brush/comb set that I have on the dresser too. The vintage "dressing table" theme suits me perfectly!

Jewelry Storage Idea

That's a wrap! I feel much more comfortable in my room now that I don't have to look away from my dresser. Tackling these small spaces in my home, one at a time, has done wonders on my comfort level. I am so completely satisfied with these results and pretty satisfied that I tackled this project all myself.

How do you organize your jewelry at home? I'd love to see pictures or hear about your solutions too.

My Second Ever Quilt

Thursday, September 26, 2013

I never thought I wanted to tackle a quilt. However, after my first experience, I started gathering supplies for two more quilts before I was even finished binding up the first one.


This second ever quilt of mine is made with a vintage flower theme, mostly pinks and greens. I chose a fleece blanket for the lining instead of batting due to cost. I actually paid less for an actual fleece blanket than for as much batting as I would've needed, and I figured it would be really warm. See, Hubster doesn't mind the pinks as long as the blanket is warm. Win-win, people!


The backside is a queen-sized bed sheet I found at the thrift store.


The quilted side is made with squares of fabric mostly from the clearance section at JoAnn's and Walmart, cuz that's how I roll.

Quilt top/fleece blanket/bed sheet

My grandma, the very person who taught me to sew, was very tickled when she saw my project one night when she came over for dinner. I just told her to not look so closely at the seams. I'm a total mess when it comes to sewing perfectly straight and all professional-like.

Peanut's quilt is up next. His will be much more masculine, with fabric from several men's 3XL flannel shirts and remnants I found at the thrift store. The back will be a cuddly soft deer-themed fleece blanket that he just fell in love with. It's maybe a little too country for my taste, but it's not my tastes that matter when it comes to him.

While I was all motivated and stuff to sew, I also whipped up some other projects that I've been thinking about for awhile. You see, Peanut has two Build A Bear animals that needed some more wardrobe items to choose from, particularly pajamas. So, I found a few tutorials online and took Peanut to the fabric store to pick out his own fabric. He liked the sailor anchor theme for the pajamas and the checkered racing fleece for the sleeping bags.

Tiger and Mr. Fluffy

There's even a cutout for the tails! Be careful with the
tutorial though. The way you'll be sewing the shorts isn't 
quite what one might expect.


Roll-up sleeping bags, aren't these the cutest?


Sometimes I just really get on a roll with my sewing. I mentioned before that my Environment, particularly my home, is one of my biggest priorities in life (after God, family, that sort of thing). Home is the most important place on earth. I strive to do things that improve upon the comfort, serenity and security we feel at home. I tell ya, that quilt of mine is sure doing a number on my love for our bedroom. I just smile every day when I see it. Next up, I've been working on framing some pictures for behind our bed and DIY-ing a new jewelry shelf. You'll see...

What projects have you been working lately?

DIY Workout Stick

Tuesday, August 20, 2013

Ever since I saw my first broomstick workout in a magazine, I've been smitten. I love how using something as simple as a stick can really change the angles and depth of a workout. It can give you a better stretch, offer you a bit more stability during challenging balance moves, and allow you to move deeper into certain moves.

Today, let's make a simple fun workout stick, shall we? You can use a regular broomstick--or even a straight stick you find outside--to do the workouts. But wouldn't it be much more fun to create an artistic workout stick that you can use whenever the mood strikes? I thought so...

Just a quick announcement: now that I'm qualified to be giving some exercise advice, I have put together three separate workouts that you can do with your new workout stick. I'll be releasing one per week for the next three weeks! So stay tuned for that, and feel free to share on Pinterest!

Workout Broomstick Tutorial

Materials

  • 3/4" (or thicker) wooden dowel from the hardware or craft store
  • Washi tape
  • Decorative duct tape
  • Acrylic paints (or other wood paint) and paintbrush
  • Any other decorative items you'd like to deck your stick out in


Dowel


Washi tape and acrylic paint


Directions:

  1. If you'd like to change the color of your dowel, use acrylic paint (or any other appropriate paint for wood) and give your dowel a few coats. Let dry. Paint stripes or designs with other paint colors if you'd like and allow to dry completely before moving on.
  2. Now, use your washi or duct tape to create fun patterns and stripes across your stick. I went with a simple light blue and green theme, punctuated by some polka dot decorative tape on the ends.
  3. Feel free to get creative with your stick design. Maybe you'd like to add some rubber elements for a good grip or add tassels to the ends of the stick. Your imagination is the limit!


Voila! Your very own workout stick for any broomstick workouts you might find online or here on my blog. I kept mine pretty simple, but feel free to get creative with your art supplies. It almost feels as though you get to play with a grown-up version of a baton. Check back here next week for my first of three broomstick workouts!


Project Details:

  • Washi tape from here and Target
  • Wooden dowel from Lowe's
  • Acrylic paints from my own stash (maybe originally from Ben Franklin?)


DIY Yoga Mat Holder Tutorial

Sunday, June 2, 2013

If there's one thing that makes me feel like I'm contributing to a more sustainable lifestyle, it's by reusing and recycling items that I already have or have bought secondhand for new uses. One such project that was born from my recycling efforts is this DIY yoga mat strap.

 photo P4211473_zps82f0c9c1.jpg


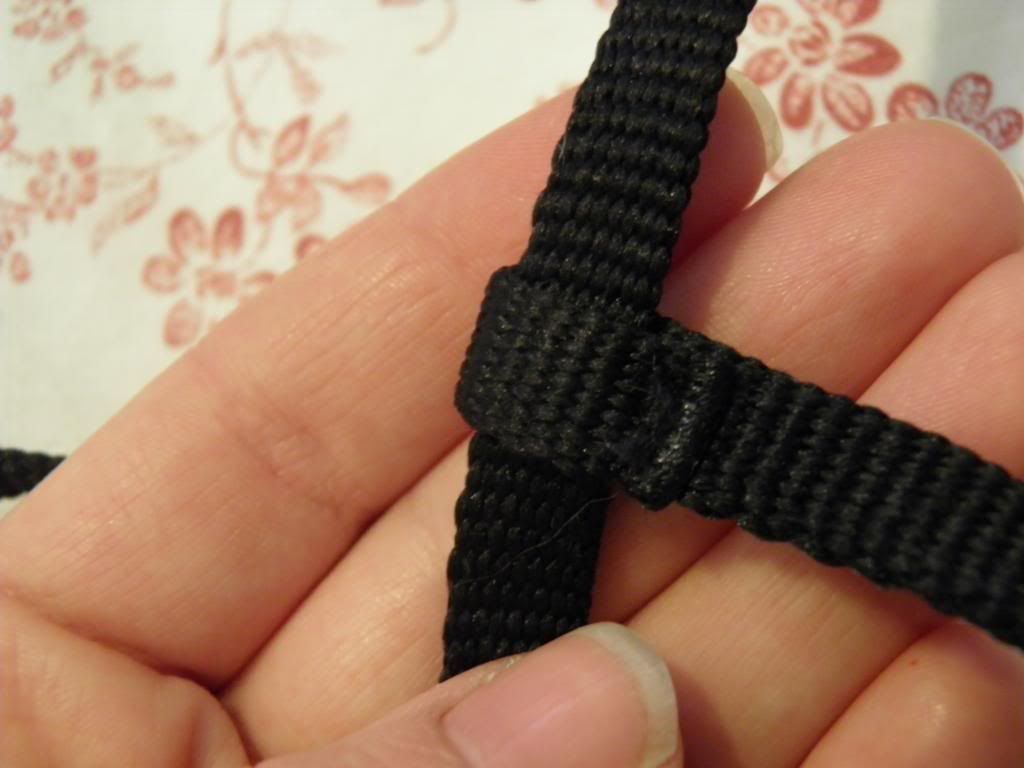
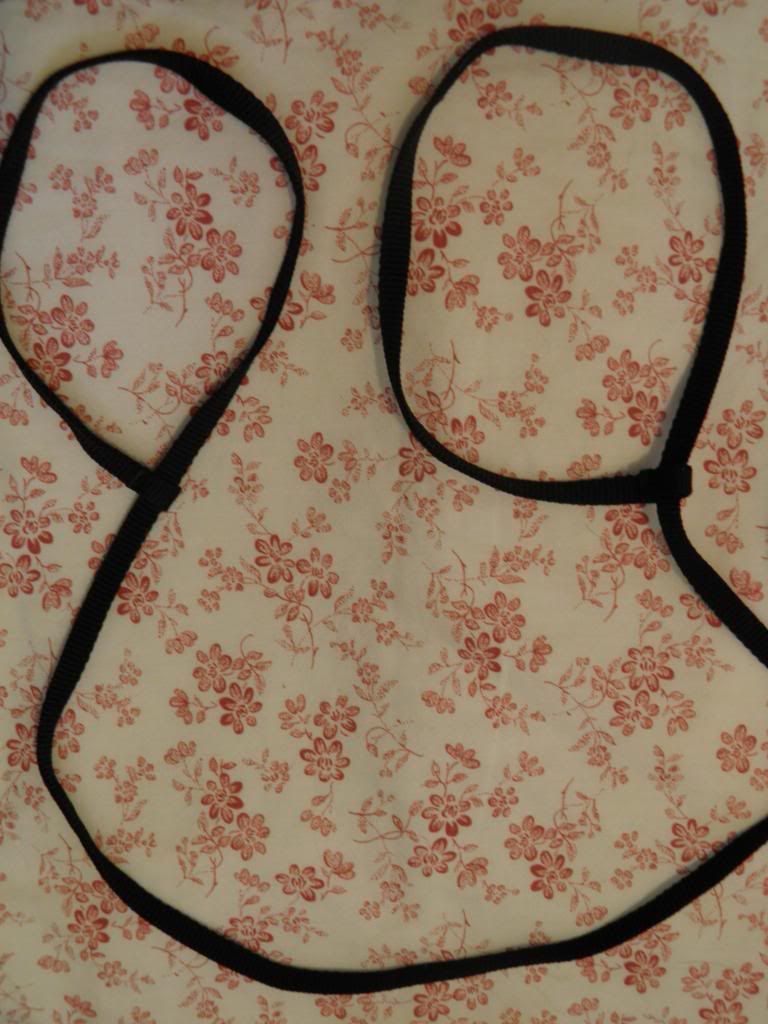
I used the black holder that came with my yoga mat (from Target) as sort of a guide when designing my mat holder. The way the strap loops around itself inspired me to produce something similar with a more aesthetically pleasing piece of fabric.

 photo P4211479_zps324da5da.jpg


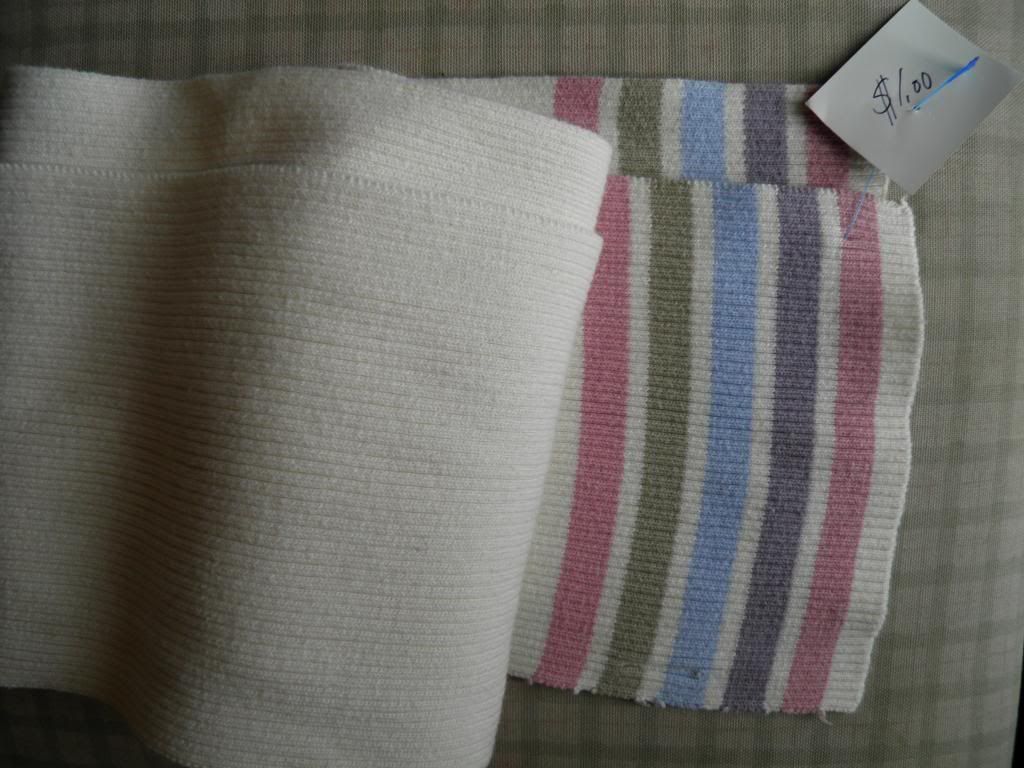
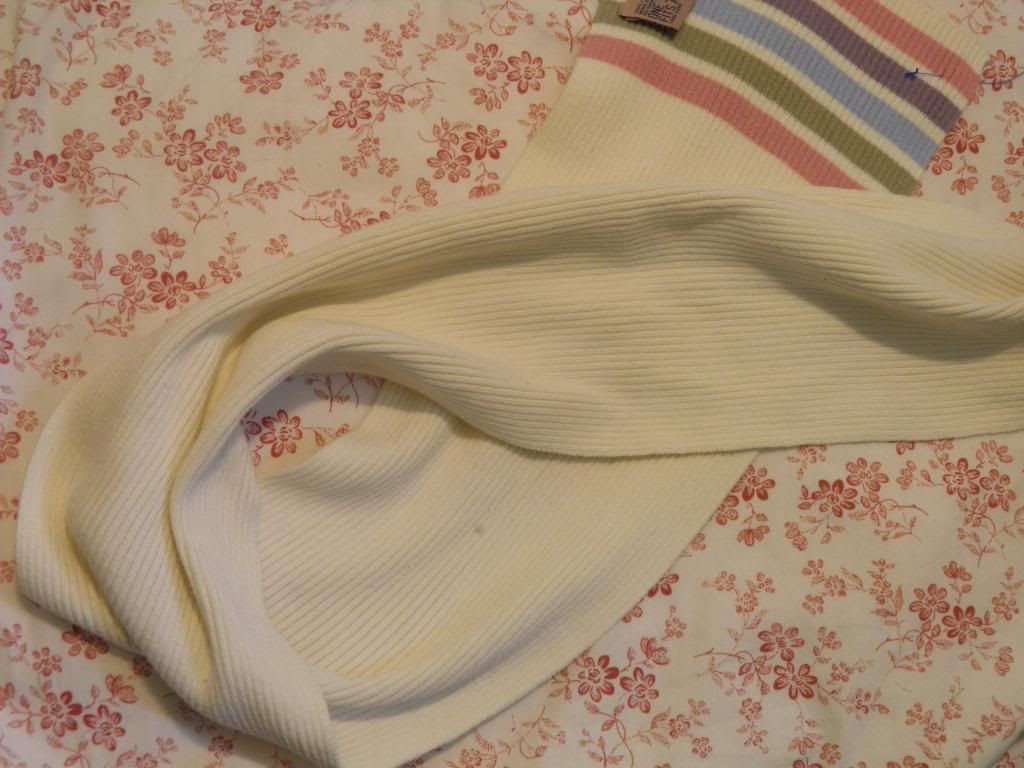
A scarf is the perfect piece of long piece of finished fabric that you can use for this project, and you can usually find scarves in an array of colors and patterns at your local thrift store or your closet. Mine was from St. Vincent de Paul. If you wanted to use other fabric, simply stitch up the edges and then follow the steps below for the looping effect.

 photo P4211466_zps1060a7e6.jpg


You'll need a scarf, sewing machine (you could do this by hand), and thread that matches your scarf.

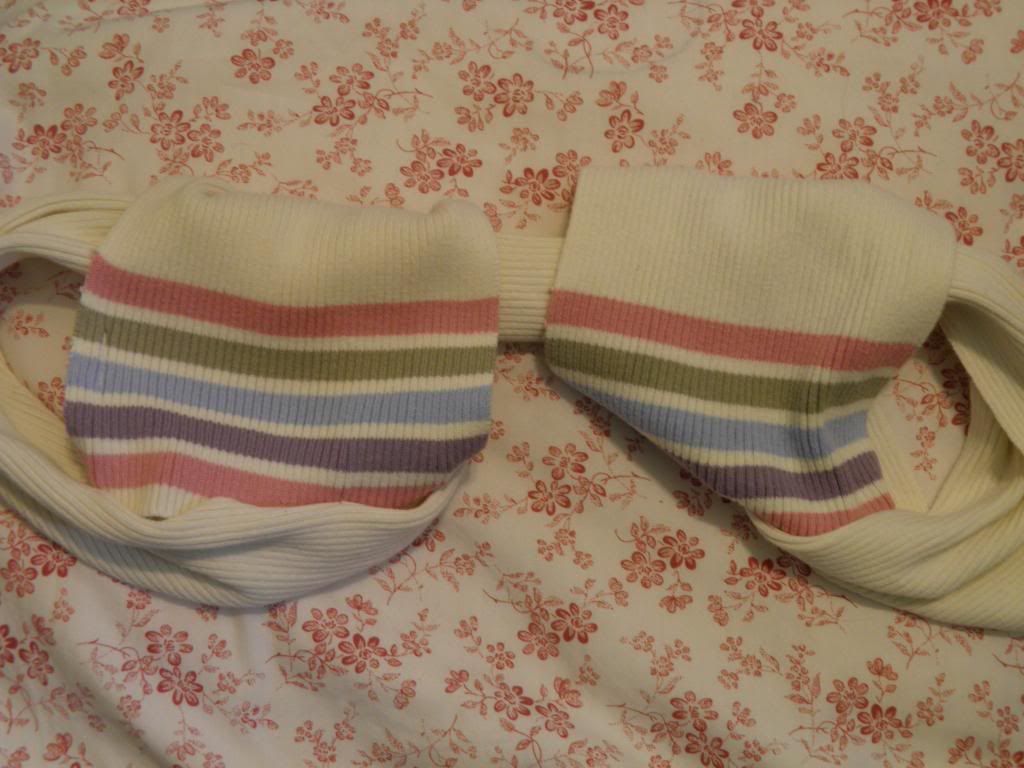
1. First, you'll want to loop one end of your scarf around itself the way this black strap does.

 photo P4211477_zps29989267.jpg

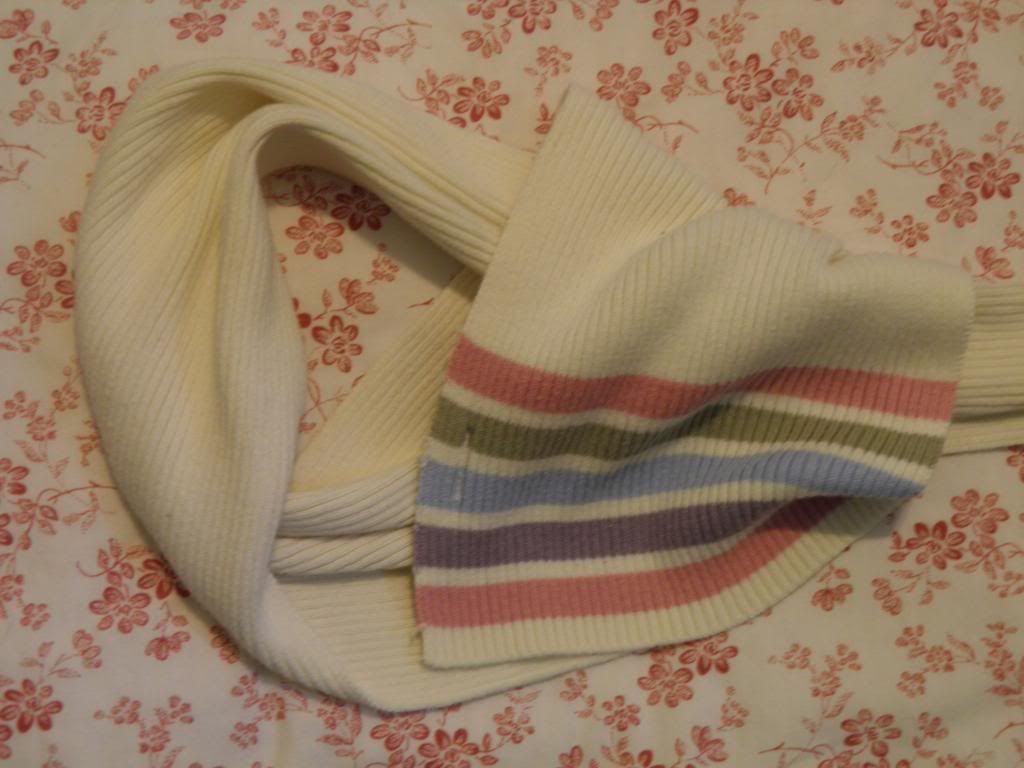
First loop one end under the rest of the scarf:

 photo P4211468_zps15b2af22.jpg

Then, loop the end back over on top of the fabric and pin the short end in place.

 photo P4211469_zps3877c2b3.jpg

Do the same with the other end and pin in place.

 photo P4211470_zps7db8e4c3.jpg


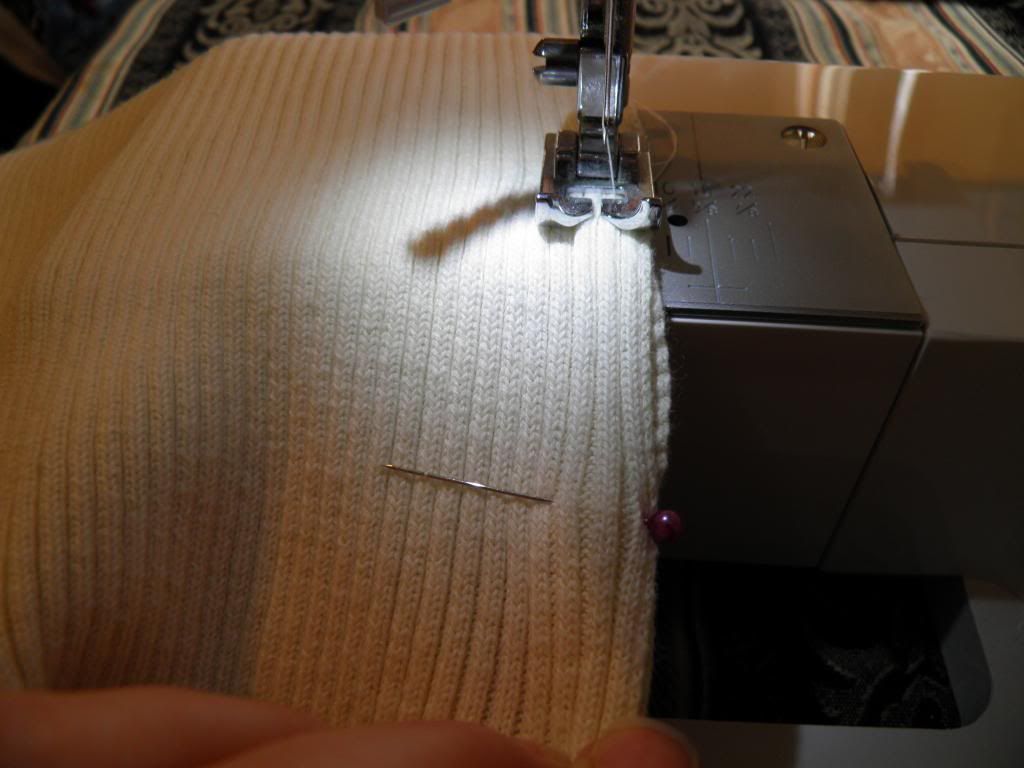
Then, sew along the edge where you pinned the scarf together. Be sure that the wrong sides of the fabric are facing each other when you sew. Repeat on both ends. You could definitely do this simple sewing by hand.

 photo P4211471_zps0c88571d.jpg


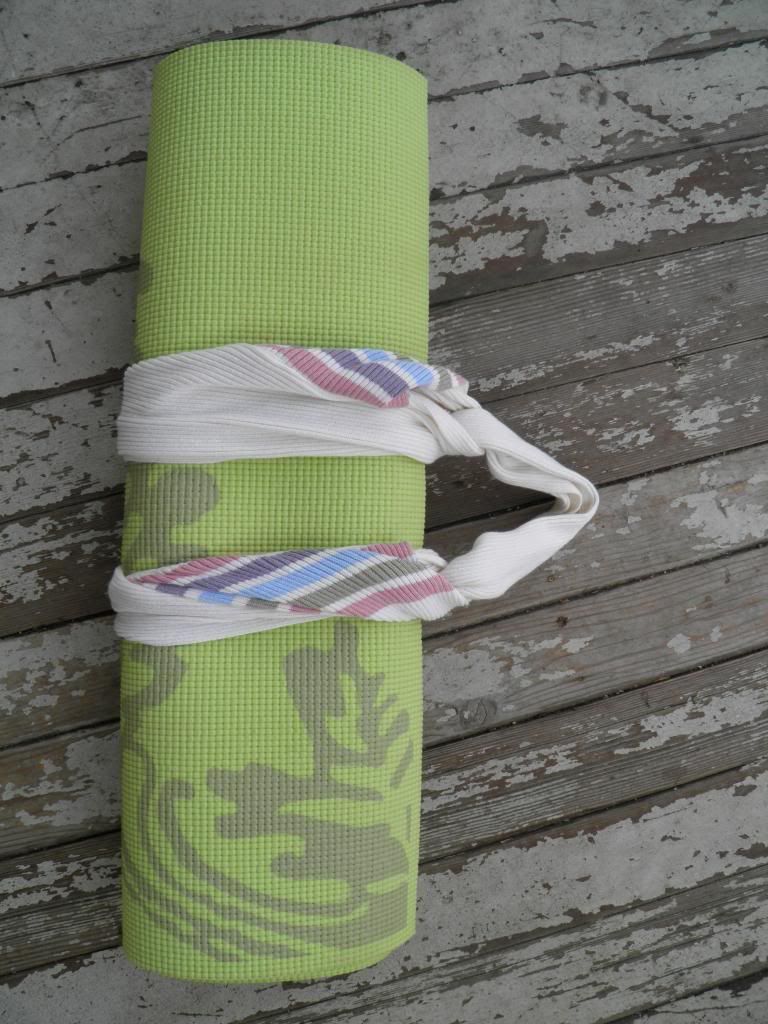
That's all you have to do, and you have a handy little carrying strap for your mat. Pretty easy, right?

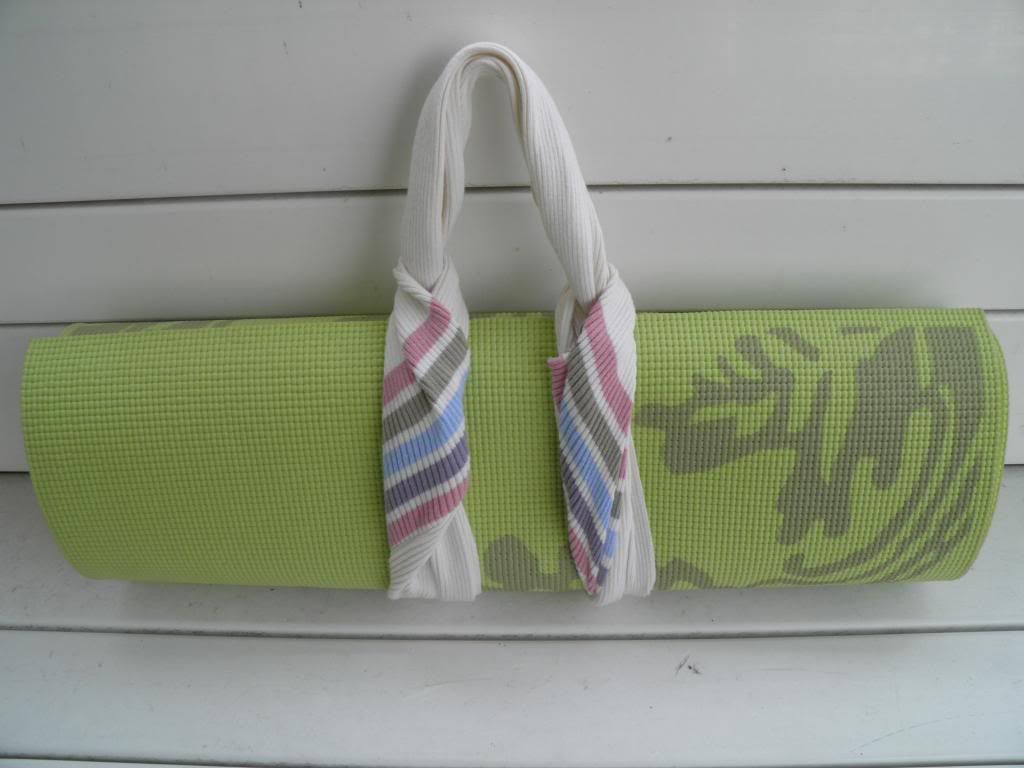
yoga mat holder photo P4211476_zps2deb87ae.jpg


I do think I would've liked a little bit longer scarf to create a longer shoulder strip. I can fit this one around my arm, but it really is more the length of a hand strap. I will surely take a trip back to the thrift store for some more scarves. This makes a great gift for the health nut or yoga enthusiast on your list. And it literally takes only a few minutes to put together, once you get that looping thing down.

I'm thinking about doing a giveaway with one of these. Let me know what you think in the comments. If you do use this tutorial, leave a link for me so I can see what you made. Happy sewing!


Skip To My Lou